Ever since Github started supporting Jekyll within Github Pages I was sold. So when it comes to easy, fast, stable, flexible, security free and high-performance websites I like to build them in Jekyll.
But choosing Jekyll is not the topic of this blog. I like to share a topic on Continuous development and Continuous Integration. When working with Magento I always preferred to be aware of the code quality I or my team wrote.
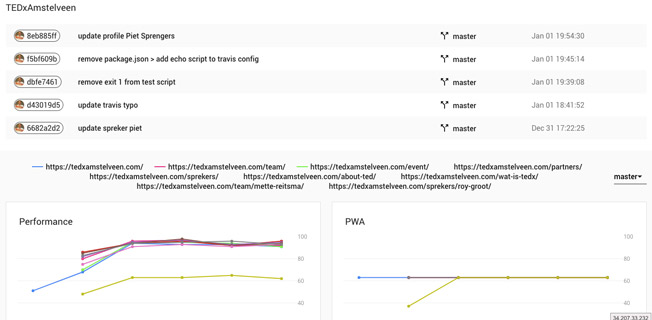
The following steps will guide you on how to setup a Continuous development and Continuous Integration developing stream on Jekyll using Lighthouse CI, Lighthouse Server, Travis CI, and Heroku.
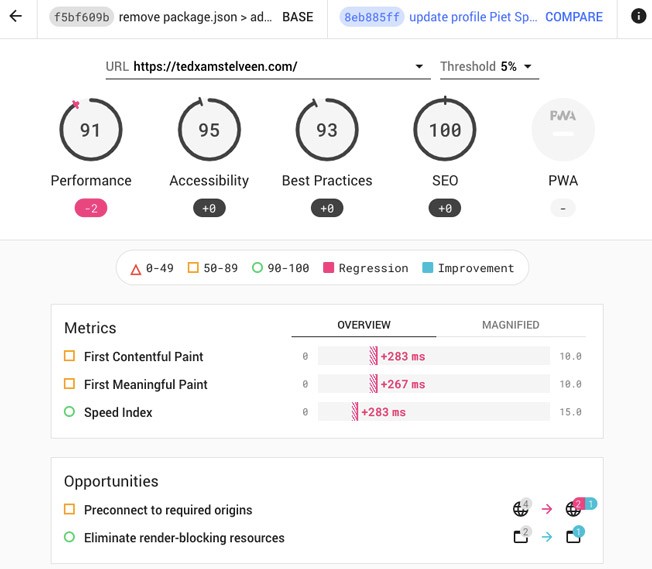
And keep in mind always Design for Performance!
Summary Steps
- Install lighthouse-ci locally
- Signup and create .travis.yml file
- Create lighthouserc.yml with the following config
- Create LHCI_GITHUB_APP_TOKEN and add it to env in Travis
- Signup at Heroku
- Install Heroku CLI
- Create Heroku config and push the app to production
- Run lhci wizard
- Add LHCI_TOKEN to env in Travis
- Update serverBaseUrl in lighthouserc.yml
- Push code to Git and let the magic do its thing!
1. Install lighthouse-ci locally
npm install -g @lhci/cli@0.3.x
2. Signup and create .travis.yml file
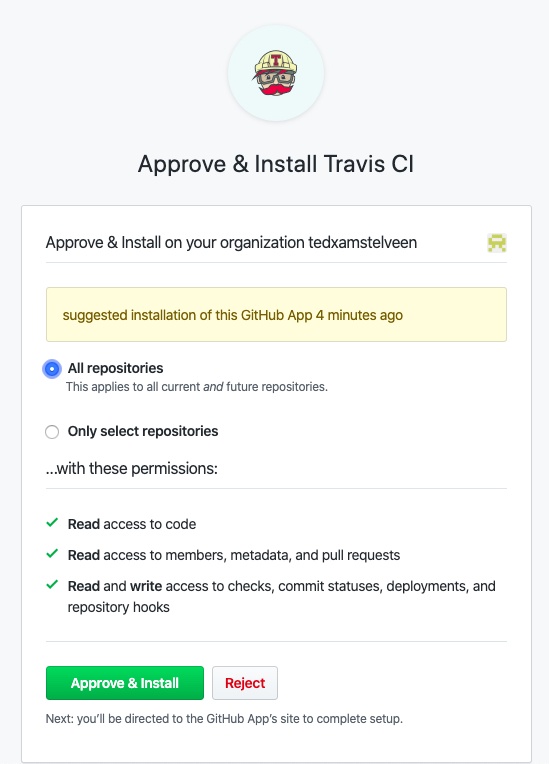
If not already, signup for Travis-ci and connect the Travis CI Github Apps to your Github profile repository.
Once Travis CI is connected to your Github account create .travis.yml in your root directory:
language:
- node_js
node_js:
- '10'
addons:
chrome: stable
before_install:
- npm install -g @lhci/cli@0.3.x
script:
- echo "Notice - no test specified"
after_success:
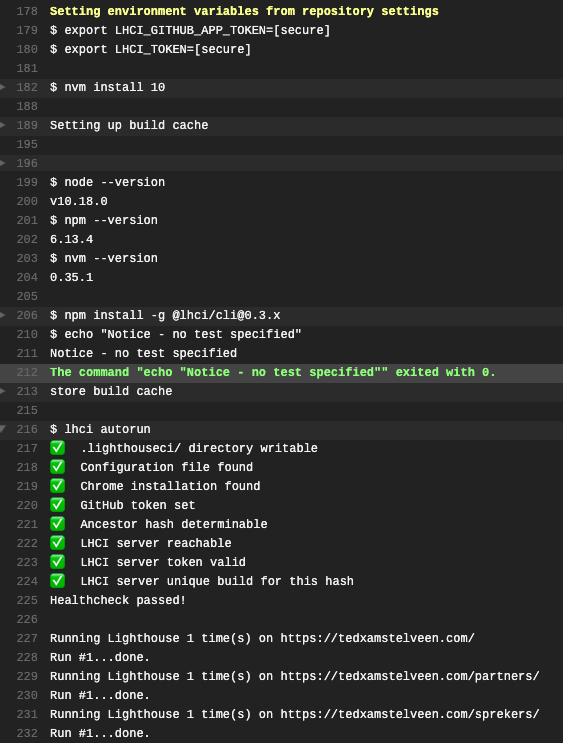
- lhci autorun
3. Create lighthouserc.yml with the following config
ci:
  collect:
    numberOfRuns: 3
    additive: true
    url:
      - https://your-url.com/
      - https://your-url.com/catalog-page/
      - https://your-url.com/product-page/
  assert:
    lighthouse: all
    assertions:
      offscreen-images: 'on'
      uses-webp-images: 'on'
      color-contrast: 'on'
      first-contentful-paint:
        - error
        - maxNumericValue: 2000
          aggregationMethod: optimistic
      interactive:
        - error
        - maxNumericValue: 5000
          aggregationMethod: optimistic
  upload:
    target: lhci
    serverBaseUrl: https://your-app-url.herokuapp.com/
    token: $LHCI_TOKEN
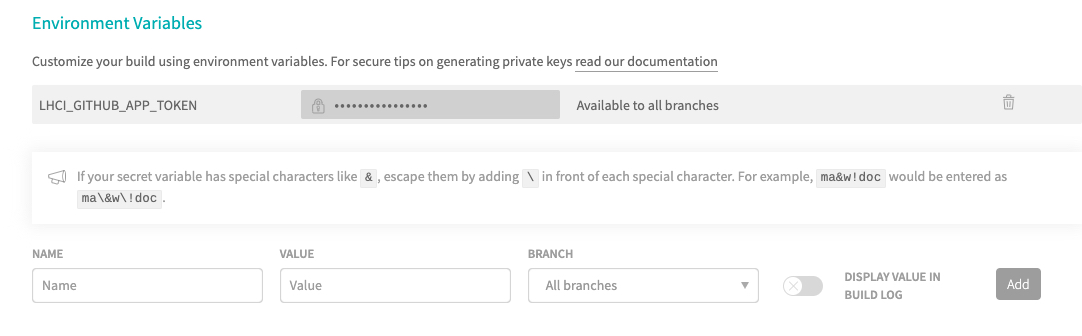
4. Create LHCI_GITHUB_APP_TOKEN and add it to Environment Variables in Travis
Click this link and add it to your Github account. Make sure to copy/paste the LHCI_GITHUB_APP_TOKEN since this will be only shared once.
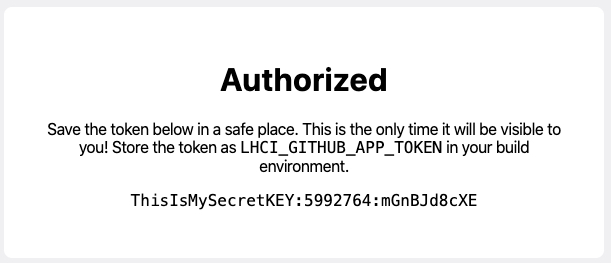
Add ‘Name’: LHCI_GITHUB_APP_TOKEN and the ‘Value’: ‘token’ into the Travis CI settings.
5. Signup at Heroku
Create a Heroku account. Remember every FREE Heroku app has 550 free dyno hours per month.
6. Install Heroku CLI
Download and install the Heroku CLI toolset.
brew tap heroku/brew && brew install heroku
heroku login
7. Create Heroku config and push the app to production
mkdir lhci-heroku && cd lhci-heroku && git init
curl https://raw.githubusercontent.com/GoogleChrome/lighthouse-ci/master/docs/recipes/heroku-server/package.json > package.json
curl https://raw.githubusercontent.com/GoogleChrome/lighthouse-ci/master/docs/recipes/heroku-server/server.js > server.js
git add -A && git commit -m 'Initial commit'
heroku create
heroku addons:create heroku-postgresql:hobby-dev
git push heroku master
heroku ps:scale web=1
heroku open
8. Run lhci wizard
lhci wizard
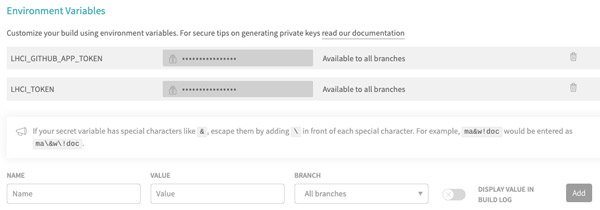
9. Add LHCI_TOKEN to Environment Variables in Travis
10. Update serverBaseUrl in lighthouserc.yml
Update the Heroku app url in lighthouserc.yml in the serverBaseUrl section.
11. Push code to Git and let the magic do its thing!
git add -A && git commit -m 'LHCI first run'
git push origin master

It’s a wrap!
I hope you liked building it, well it did when prepping this.
Manual LHCI autorun
lhci autorun